Monday, July 16, 2012
It's a Girl Thing: Bicycle Diaper for Baby Paige
It's a Girl Thing: Bicycle Diaper for Baby Paige: My niece Paige just turned 1 month old last July 6 and I decided to give her a gift that she can use. Although, she could not ap...
Bicycle Diaper for Baby Paige


My niece Paige just turned 1 month old last July 6 and I decided to give her a gift that she can use.
Although, she could not appreciate the design I made but her mom (my sister) really likes the bicycle diaper i make for her little angel. This is my very first time to create a stuff from diaper. Hope to make more on Paige every month celebration.
Thursday, July 5, 2012
DIY Nailart: Simple White Polka Dots

Simple but elegant looking blank and white polka dots with fuschia pink french tip
Black Nail Polish of your choice, white 2 way nail art pen, fushcia pink and yellow nail art brush

Paint the nail black. Make sure to apply first a base coat to protect your nail :)

Make a diagonal line at the center of the thumb nail and half fill it with white

Add another diagonal line using the fuschia pink nail art brush

On the black side, make a white polka dots

And make another diagonal line using yellow nail art brush

On the other remaining nails, make a french tip using the fuschia pink nail art brush'
and make some polka dots.
Hope you like this :)
Wednesday, June 13, 2012
Hi Im your DIY Girl Bluebu2witz, another Do-It-Yourself Nail Art Tutorial to share with you guys. I really really love Burberry but I can't afford to buy this signature brand so I just painted it on my nails.


 ca
ca


Painted my nails with Touch of Tan

Using the white nail art brush, make a 2 vertical lines

Then 2 horizontal lines across the vertical lines

Using black nail art brush make 3 vertical lines

And 3 horizontal lines

To finish the burberry effect, make a vertical line using red nail art brush
 ca
ca
Across the red vertical line, make a horizontal line

So easy and now I have a Burberry Inspired Nail Art :)
Friday, June 8, 2012
DIY Nail Art Tutorial: Back to School
Hey It's Back to School and I miss being a student. New bags, shoes, notebooks and other school supplies reminds me of being a student. This DIY Nail Art brings me back to my school days.


Materials Needed:
Red, Blue & Black 2 Way Nail Art Pen
White Nail Polish
Top Coat

Above picture, one coating of White Nail Polish,
and below I think it's 3rd coating to get the desired texture

Using the BLUE 2 way nail art pen a make a horizontal lines

Next using the RED 2 way nail art pen make a vertical line so it will look like a note pad

Put 3 dots using the BLACK 2 way nail art pen, to have the notebook effect

Create a 5 + 21 at Thumb, XO at index finger,
A + at Middle Finger and Smiley Face at Ring Finger

Create a Heart Shape at Pinky Finger

This is my Back to School Nail ! Ready to touch the keyboard :)
Monday, June 4, 2012
Food Trip at Seafood Island
Babes invited me for a dinner at Seafood Island (Trinoma). I've searched if they have website and found out that they have branch at Alabang Town Center. Yipee its just 10 mins walk from my office and saves our time travelling to QC.

Hmm... What will I order?

My favorite Buko :)
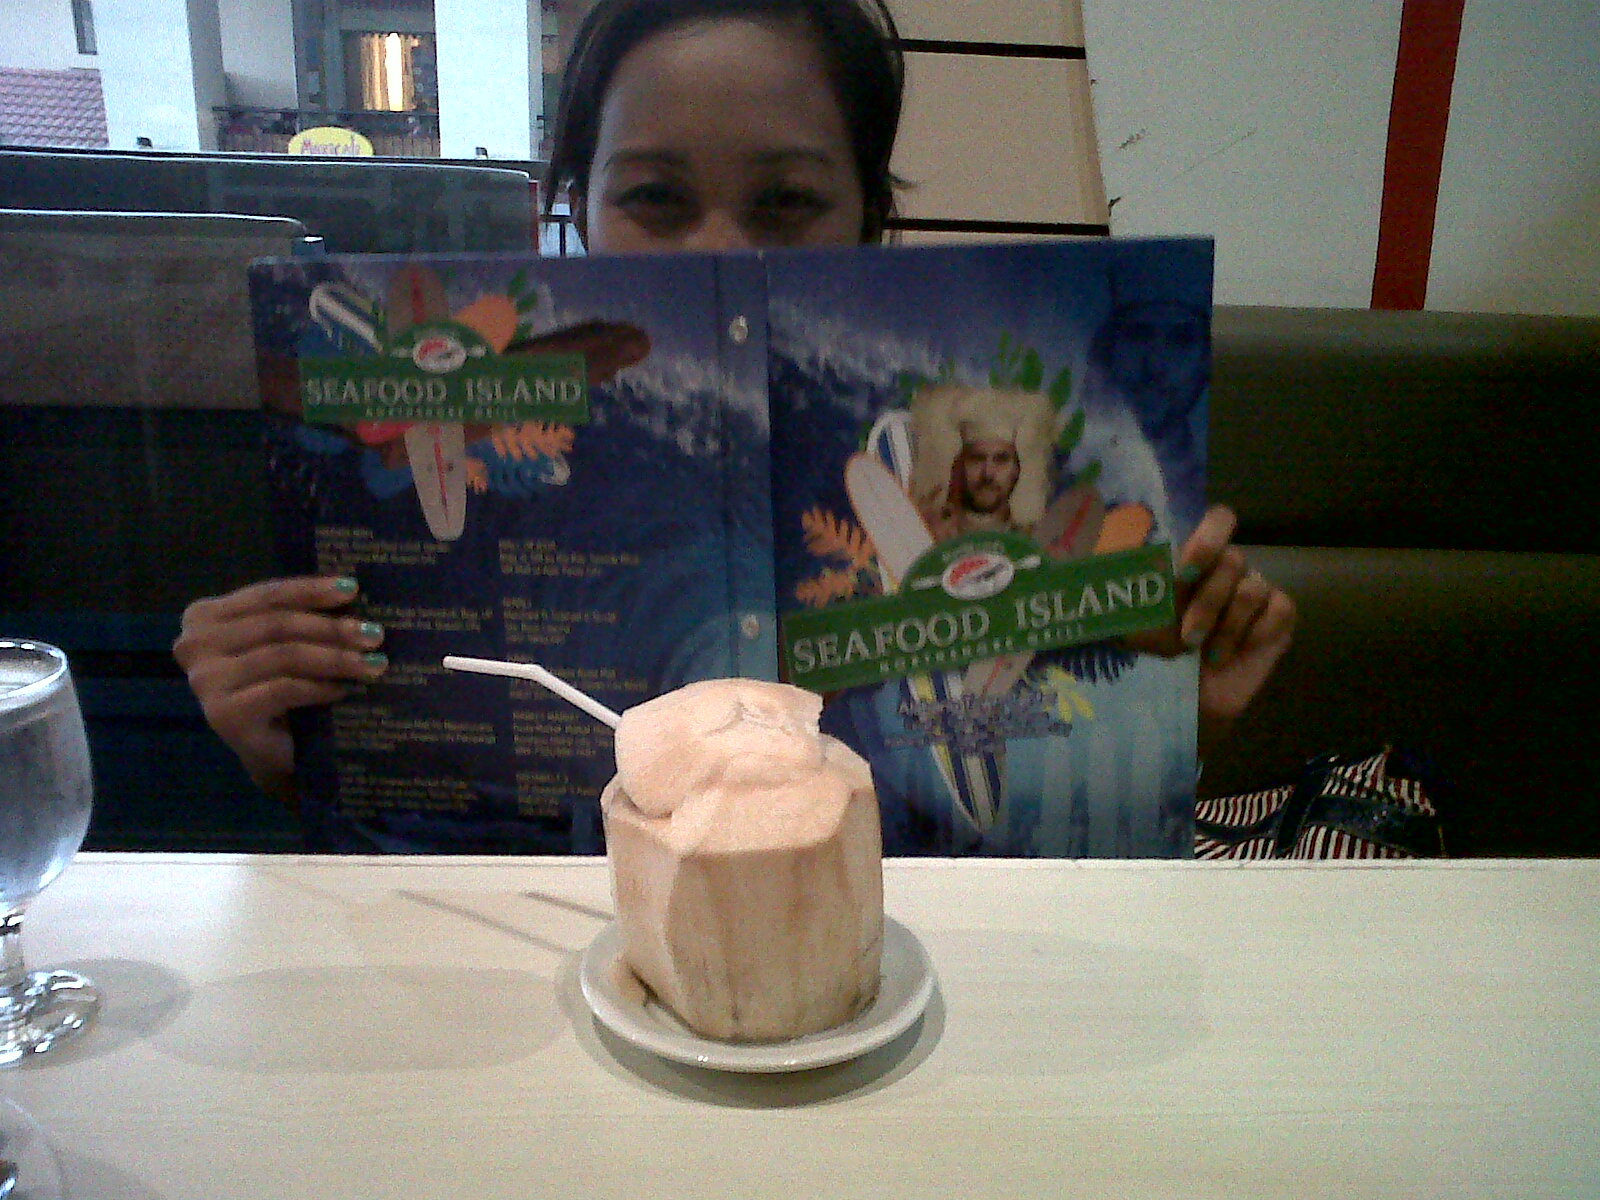
The usual picture taking while waiting for the order

Boodle Feast: Tali Beach (P995)
Good for 3-4 persons which includes Chicken Inasal, Pork BBQ, Crab, Shrimp, Squid, Mussels, Seaweeds (Lato), Eggplant,Watermelon Slices, Green Mango with Bagoong

I like the ambiance, their summer theme. I'll try to visit again and invite more friends to dine and have chit chat while waiting for orders.
Thursday, May 31, 2012
DIY Nail Art Tutorial: Blackberry Inspired
Another DIY Nail Art Tutorial from me. Its a Blackberry Inspired Theme. Hope you like it :)


This is what my Home Screen looks like

Materials Needed:
- Green, Black & Clear Nail Polish
- Blue & White 2 Way Nail Art Pen-Brush
- Gray Nail Art Brush

Painted the nail black and on the index finger using the white nail art pen I make the Blackberry Logo

On the middle finger, using the blue 2 way nail art pen-brush, I make a square and filled in. Then using white nail art pen-brush I make small "f" and outlined the square.

On the ring finger, using white 2 way nail art pen-brush. I make square again and outlined it using blue 2 way nail art pen - brush and this time I make an envelope.

On the pinkie finger, I just make an arrow. And for the thumb, I make a globe.
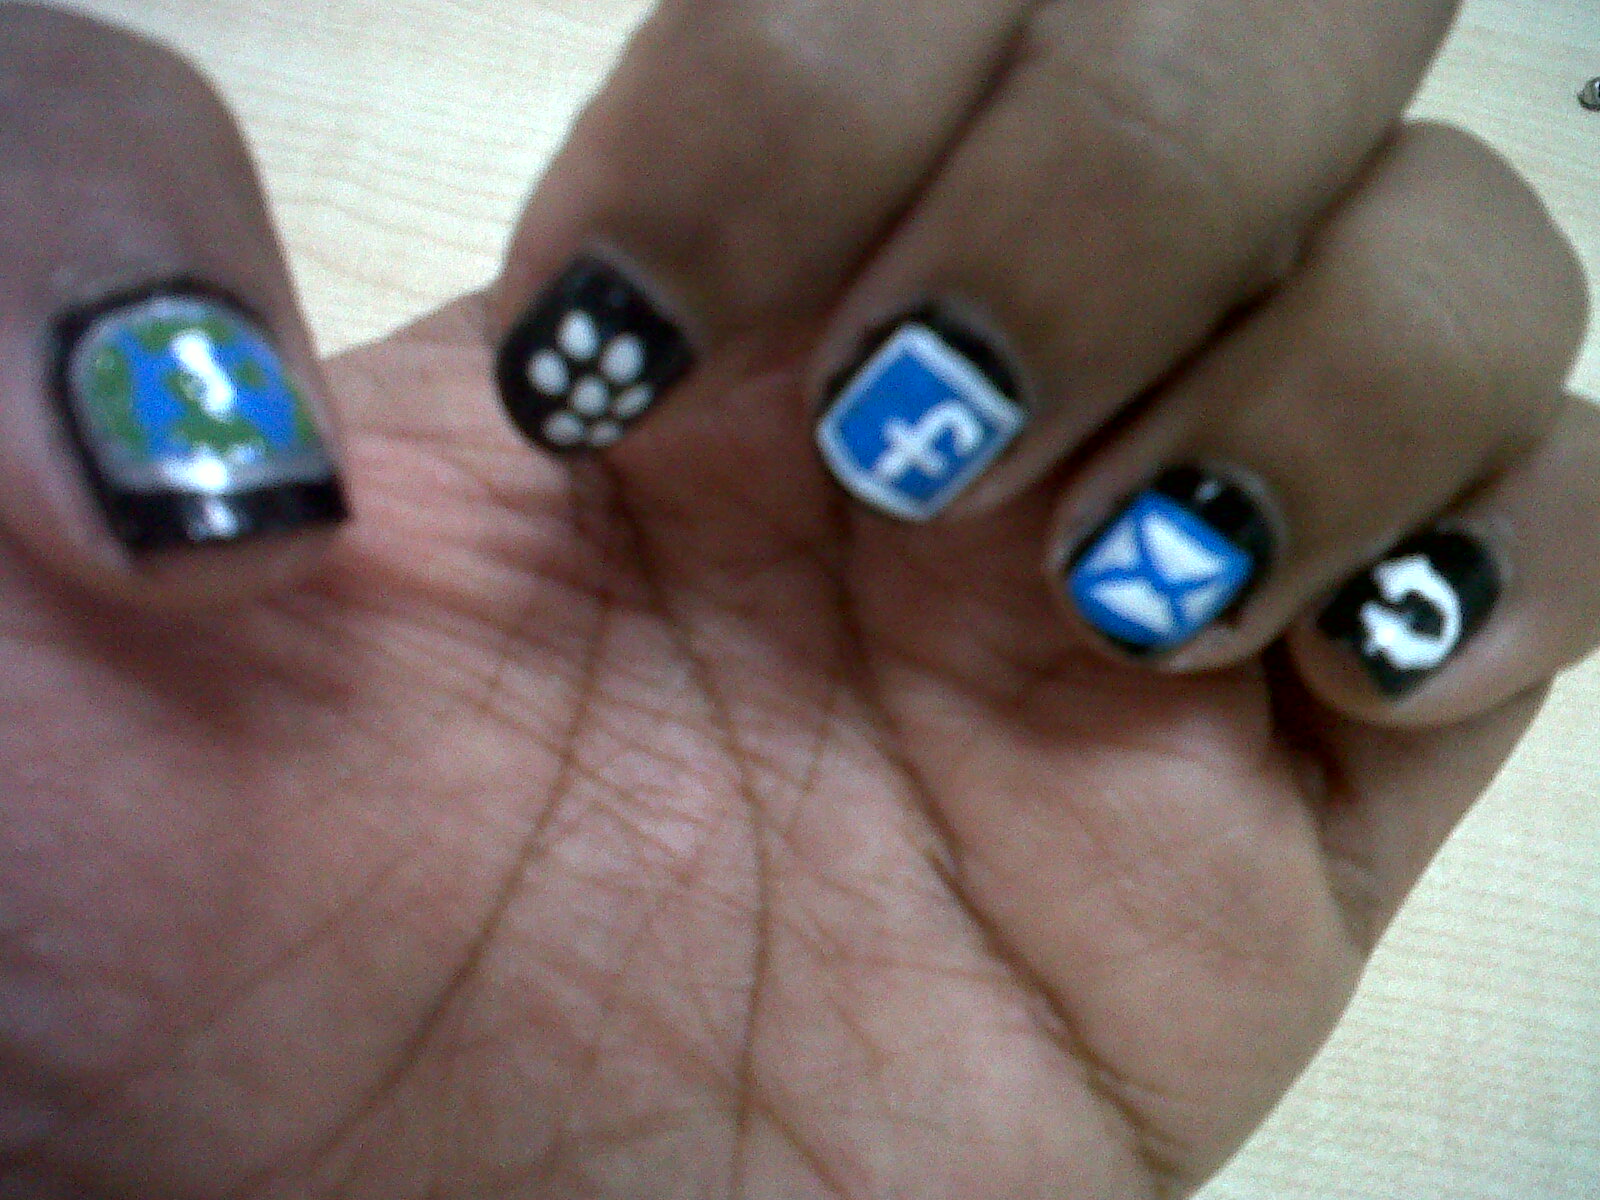
This is it! It takes me a lot of time making this nail art. And glad I turns out nice :)
Subscribe to:
Posts (Atom)